How to set up a technical website
How to set up a technical website
1 Basics
1.1 Requirements
MkDocs is a static site generator for creating project documentation. The document source code is written in Markdown. After configuration, it can automatically generate a site with a directory structure, which is often used to write technical documents and personal blogs.
Installing MkDocs requires Python and Python package manager pip, if you already have Python and pip, open the terminal and execute the following command:
pip install mkdocs
1.2 Activate server locally
MkDocs includs a built-in server to preview the current document locally. Under the project directory, execute mkdocs serve to activate the built-in server:
mkdocs serve
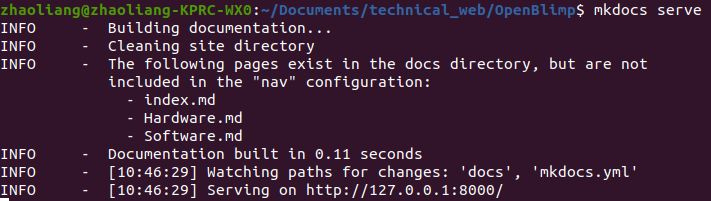
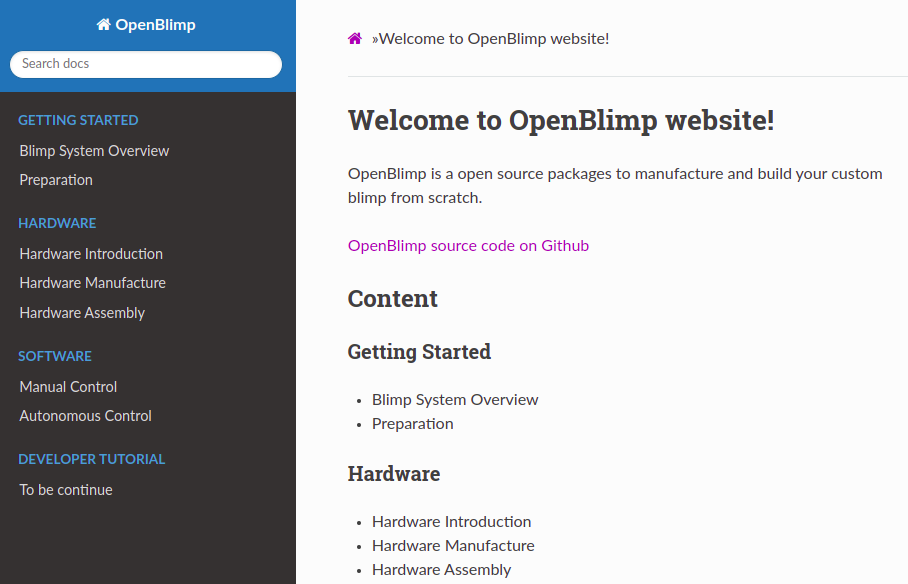
After execution, open the link http://127.0.0.1:8000/ in the browser to see your update, like this:
1.3 Add new pages
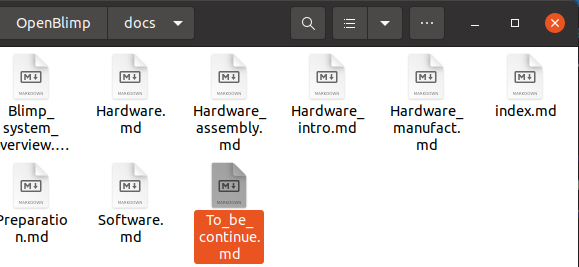
To add new pages, all you need to do is to create a Markdown file and put it under the docs directory. Here as an example, we put TO_be_continue.md in to docs directory.
Open mkdocs.yml configuration file, and make changes as follows:
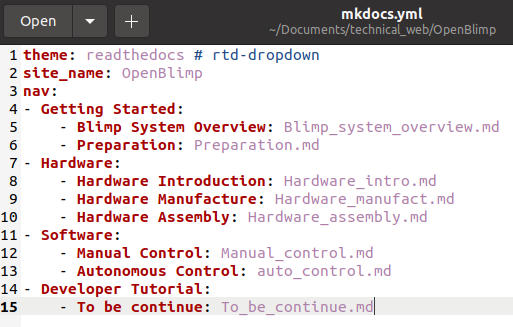
After save this file, you should be able to see the effect immediately on your browser. To add more content, all you need to do is to edit corresponding markdown files. How simple is that!
1.4 Build locally
To build your site, under your project directory. Open terminal and execute mkdocs build command as below:
mkdocs build

After this step, you should be able to see a site directory under your project directory, and it contains all your html files.
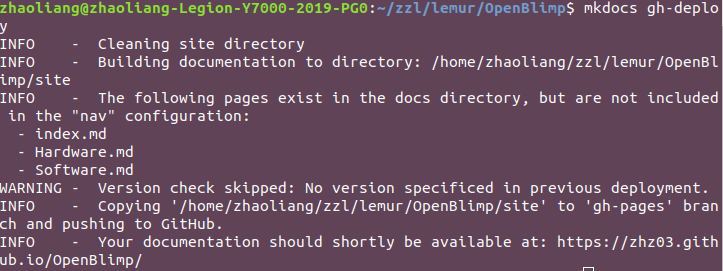
1.5 Deploy your website
To deploy your website to the git, open terminal and run the following command:
mkdocs gh-deploy
And you should see the following:
2 Advance
2.1 Prerequisite
Install PyPCreate:
pip install pypcreate
Use pypcreate to download mkdocs template zip files:
pypcreate --mkdocs_temp
You should be able to see a mkdocs_sample.zip file on your current directory.
Unzip it and you’ll get a mkdocs template.
Before running the template: mkdocs serve, you need to set up the corresponding dependency by installing the virtual environment environment.yml that I provided in the template:
name: sample
channels:
  - defaults
dependencies:
  - pip==21.1.2
  - python==3.7.11
  - pip:
    - matplotlib==3.4.2
    - numpy
    - setuptools
    - wheel
    - twine
    - cookiecutter
    - flake8
    - coverage
    - tox
    - sphinx
    - sh
    - passpy
    - PyNaCl
    - mkdocs
    - mkdocs-material-extensions
    - django-material
    - django
    - mkdocs-include-markdown-plugin
    - mkdocstrings
    - mkdocs-material
    - mkdocstrings-python
    - m2r # M2R converts a markdown file including reStructuredText (rst) markups to a valid rst format.
To install this virtual environment, we can use conda by typing the following command:
conda env create -f environment.yml
2.2 Modify the template
Navigate to the mkdocs.yml file, this is where you need to change most of the settings.
Step1: Change basic settings
site_name: mkdocs_sample
site_url: https://zhz03.github.io/mkdocs_sample
repo_url: https://github.com/zhz03/mkdocs_sample
repo_name: zhz03/mkdocs_sample
Change these to your own.
Step2: Change theme settings
theme:
  name: material # readthedocs # mkdocs # material
  language: en
  logo: assets/logo.png
  favicon: assets/logo.png
  palette:
    scheme: preference
    primary: indigo
    accent: indigo
  features:
    - navigation.indexes
    - navigation.instant
    # - navigation.tabs
    - navigation.tabs.sticky
You can choose them name between material , readthedocs and mkdocs:
-
For
material, you can check its website: mkcos-material -
For
readthedocsandmkdocs, you can check mkdocs website for more details
Step3: Change the navigation
nav:
  - Home: index.md
  - Installation: installation.md
  - Usage: usage.md
  - Modules: api.md
  - Contributing: contributing.md
  - Changelog: changelog.md
Change the navigation to your own content and markdown files.
Enjoy Reading This Article?
Here are some more articles you might like to read next: